Difference between revisions of "Tiled: Basic Guide"
m (Categorized it under Mapping Guides, which will be made a subcategory to the main Guides section.) |
|||
| Line 40: | Line 40: | ||
You can just resize your tileset window to hide those extra tiles and not accidentally place them. | You can just resize your tileset window to hide those extra tiles and not accidentally place them. | ||
| + | |||
| + | [[Category:Mapping Guides]] | ||
Latest revision as of 02:04, 29 July 2014
Contents
Views
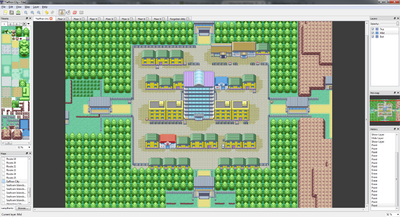
Tiled offers different Views which you can active through the Views -> Views and Toolbars menu. Once activated you are free to move them around. You’re able to snap them to the top, left, right and bottom or pop them out and freely place them anywhere.
Controls
There are 4 tools you can use to manipulate your map. (Please note that all tools only ever affect the selected layer)
Stamp Brush (B)
- The Stamp Brush is your basic painting tool; you will use this most out of all the tools.
Bucket Fill Tool (F)
- You probably know this tool from any photo editor. It fills in a space that contains the same tile (or none) with your selected tile(s)
Erase (E)
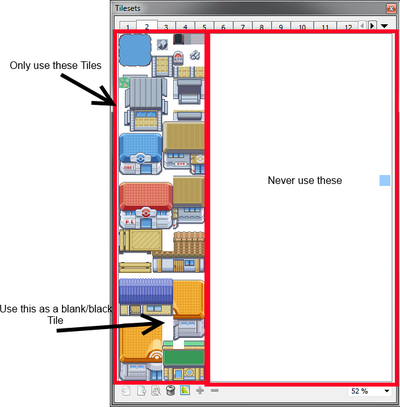
- This one is pretty self-explanatory, it lets you erase tiles. While you don’t have to worry when deleting tiles in Mid- or Top-Layer, be aware that the bottom layer always must have a tile at every spot. Leaving it empty will end up showing as the very first grass tile on sheet #1. You can use the tile shown in the “Extra Notes” to get a black/blank floor.
Rectangular Select (R)
- It does what it says: select a rectangle. You can use this to delete huge parts of a map by selecting an area and pressing the delete key on your keyboard. It also enables you to copy/cut/paste the same way, using CTRL +C, CTRL + X and CTRL +V.
Keyboard Shortcuts
Aside from the default shortcuts, such as Ctrl + Z to undo and Ctrl + Y to redo, there are a few Tiled specific ones
- Switch between the 4 tools listed above by pressing the key noted in brackets. You can also view these in Tiled by hovering your mouse over the icon.
- Ctrl + Page Up switches one layer up. Respectively Ctrl + Page down switches one layer down.
Tips & Tricks
You can make your life a lot easier if you keep some of these in mind.
- You can quickly switch between sheets by scrolling the mouse wheel while placing your cursor over the top of the tileset window, if your mouse has one.
- Right-click a tile on your map to select it for use. Click and drag to select multiple tiles at once.
- Left-click and drag your mouse inside the tileset window to select multiple tiles.
- Press and hold Shift, then click somewhere on your map. You can draw “straight” lines this way. Just click again to draw the line.
- Press and hold Shift + Ctrl to draw an ellipse the same way.
- Made your map too small and want to add something above everything you already mapped? Just use the offset in the resize window so you won’t need to copy/paste everything around.
- If you used “invisible” tiles somewhere, you can find them by using the fill tool and hovering your mouse over different parts of the map.
Extra notes
Although we are using the same tiles in this editor as with the old one, there is one small difference. The tile ids used in our mapfiles were made to fit tilesheets with 25x32 tiles instead of the actual 8x32 ones we are using in the client. To make Tiled usable those “missing” tiles were just added to our tilesheets. Although you can place those tiles now, the client doesn't handle them correctly (yet) causing wrong tiles to appear at those places.
You can just resize your tileset window to hide those extra tiles and not accidentally place them.

